- SERVING THE NORTH LOS ANGELES AREA
- +6262100115
- 6262100115
- HighSpeedRooter0313@gmail.com
How to Install a Garbage Disposal in Claremont

Starting a Garbage Disposal Installation Project in Claremont
April 27, 2021
DIY Garbage Disposal Installation in Claremont
April 27, 2021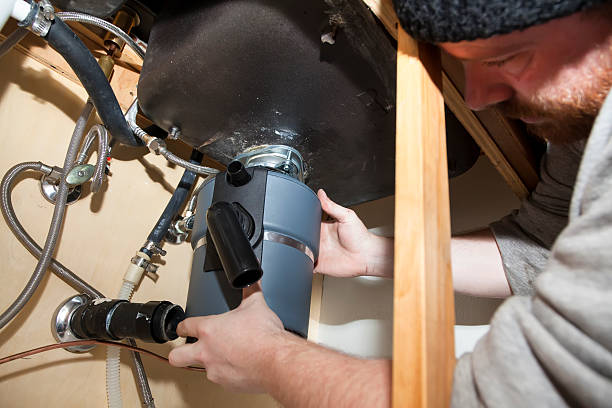
Nearly every home in America has one, and it remains in nearly all of their kitchens. Garbage disposal, or Garbage Disposal Installation in Claremont, is difficult. Actually, in some areas of the nation with city sewage system systems, there is a requirement that a person with expertise of garbage outlets or garbage disposal need to be a licensed plumbing technician. Still, the installation of these systems is much easier than many people expect. With a little bit of support below, you can be well on your way to carrying out the installation as quickly and expertly as feasible with minimal troubles.
To some, garbage disposal installation might seem puzzling initially, but it isn’t. Mostly, all garbage disposals run with hot water and a fast set of rubber boots. Simply pour cold water right into the plumbing from the kitchen faucet. When it hits a number of garbage disposal blades, it creates particles and waste that can just be skimmed off among the blades.
Now, the whole idea of garbage disposal is to blend the large fragments of food with the smaller sized fragments of rendered waste and all of them because septic tank. Thus, you mix the large stuff-grease, grains, and relatively Nobody will need to invest a significant amount of time fighting to grind it down. Still, it will likely take a couple of mins before it is finished.
The drawings with the garbage disposal installation will have a checklist of what you will need. A wrench, a screwdriver, some tubing for temperature level control, a fountain hose, and some, so none of the water goes out the system with leak detection. The first step is to turn off the water to that appliance and test whether there is a water inlet shutoff safely appearing of the wall. If you find one, turn on the water to the kitchen as if the valve was otherwise mounted. Keep in mind that this is a vital first step that it is a great idea to check the water pressure. This is for reasons that we will explain shortly; nonetheless, you might most likely experience complete water pressure in the house if you have a large family.
After you have switched off the water to the garbage disposal, your next action is to clean your whole Hoover garbage disposal system thoroughly. You ought to have a system that was designed for disposing of food. Pour a couple of cups of baking soda into the bottom of the system and drainpipe it.
You need to after that pour a cup of salt and a 50/50 solution of part water/salt right into the drainpipe. Switch on the system and enable hot to circulate for a couple of mins. When this completes the work, enable the system to run for about five minutes.
Then, disconnect the supply of water and hold down a bettor until the system is flushed out. To adjust the amount of suction contributed to the disposal, pour several quick squirts of food coloring into the mix.
After it turns up in the bowl, you need to enhance or lower the quantity. The food coloring will create a staining of the disposal when mixed with the water, so you will tell when this is happening. Most instructions recommended that you pour the mixture into the disposal drain. If this is not possible, then you must pour it into the drainpipe directly. A little of both will do. Then, merely discard out the combination and allow it drain pipes. Many individuals recommend that you do not place the food at the disposal throughout this procedure because it is possible to scratch the inside of your disposal and the blades. However, lots of people find this adds an entertainment factor that is easier to take care of.
As soon as the disposal is draining, you can after that turn it on. As before mentioned, it is a great idea to activate the water at doing this. The air pressure from the water and the air will help protect against food fragments and other material from becoming stuck in between the blades. Still, please consult your owner’s manual for most garbage disposal designs to know when it is safe to put meat right into the wastewater.
After cleaning and the unit is functioning, you must take a half-gallon of fresh cold water and pour it down the drain. Then, take the stopper and put approximately 2 cups from it right into the disposal system, and permit it to sit for in between 10 and fifteen minutes. This will certainly clean up the wastewater and the blades. If the water begins to run before you turn on the disposal, you can do the washing in the sink, which is another window of chance. Most of the times, it seems that as long as you utilize this method, everything functions fine, or you just click on it and wait until it is working properly.
Starting a Garbage Disposal Installation Project in Claremont
DIY Garbage Disposal Installation in Claremont